How To Create and Mint a Token (ERC-20 Token) in JavaScript
A faster approach to get you up and running


The goal of this guide is to demonstrate how to create an ERC-20 token in as little time as possible using JavaScript and the Bunzz SDK without writing Solidity.
This guide is divided into two parts, both covering the following major concepts respectively:
- Creating and deploying an ERC-20 token to the blockchain in ten minutes
- Minting an ERC-20 token in JavaScript and making it public
Let's start with the basics: What is an ERC20 token?
What Is an ERC-20 Token?
ERC-20 tokens are sets of 'fungible' digital tokens that live on the Ethereum network.
The ERC-20 standard allows developers to create their own tokens on the Ethereum network.
ERC stands for Ethereum Request for Comment.
Ethereum is not just a blockchain, like Bitcoin; it is a platform. This means that developers and builders can leverage it to build products and solutions without building their own blockchain from scratch.
With the ERC-20 standard, you can build a cryptocurrency on the Ethereum network. Many well-known digital currencies use the ERC-20 standard. Some popular examples are:
- Tether USD (USDT)
- USD Coin (USDC)
- Shiba Inu (SHIB)
- Binance USD (BUSD)
- BNB (BNB)
- HEX (HEX)
- MAKER (MKR)
To create a digital currency using the ERC-20 standard, you need the following to complete this guide:
- VS code IDE or any other IDE
- Knowledge of JavaScript/React
- Bunzz console
- Bunzz SDK
- MetaMask browser extension
Let's begin.
First, You will create the token on the Ethereum blockchain using the Bunzz console before finally minting the token with JavaScript using the Bunzz SDK.
How To Create an ERC-20 Token
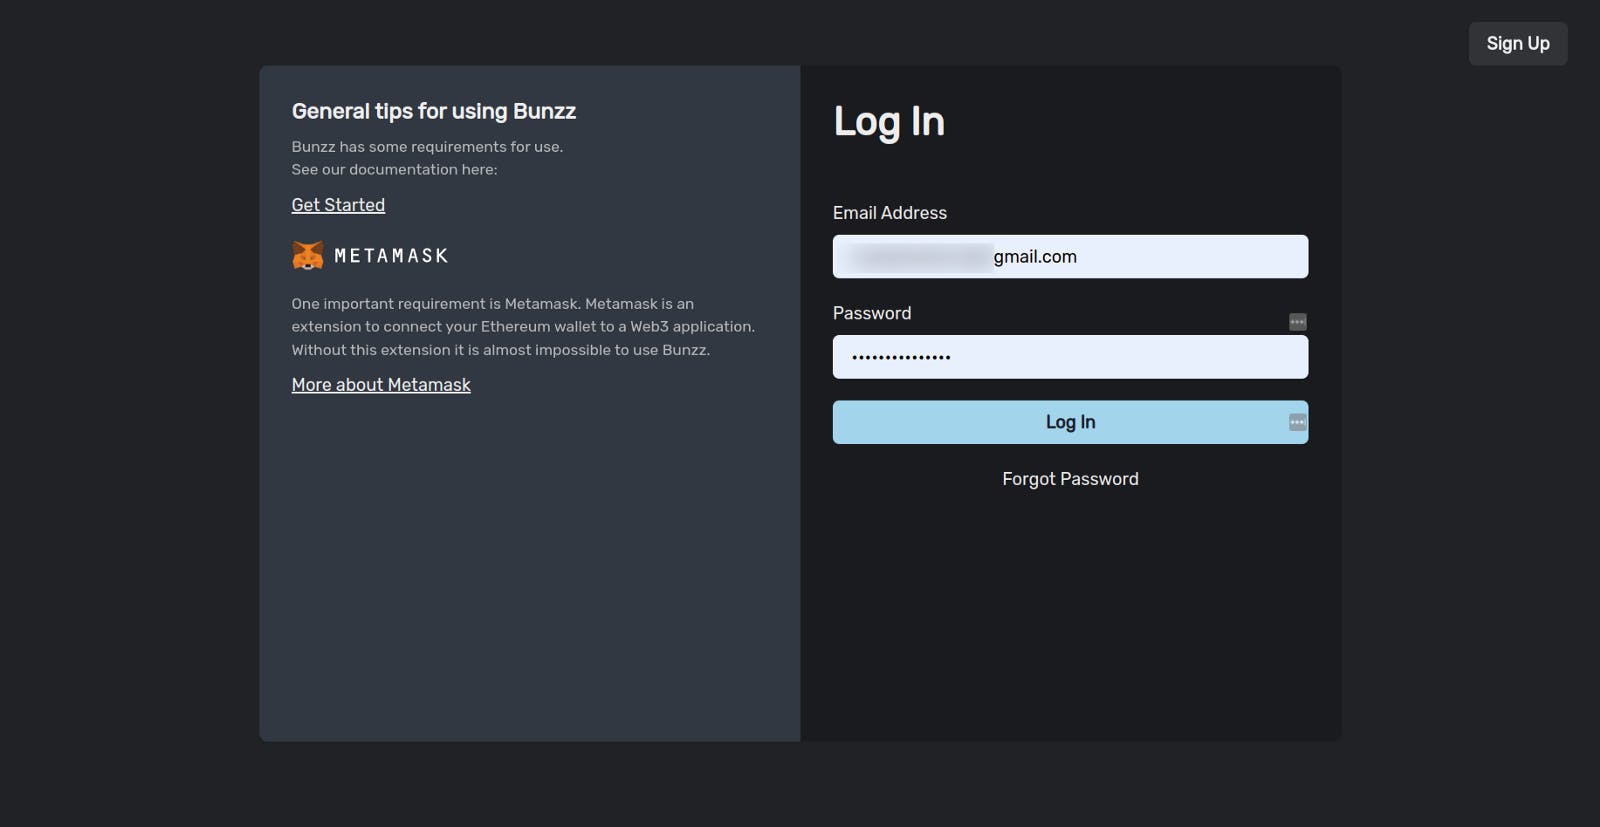
First, visit Bunzz and log in or sign up if you're new to the platform.
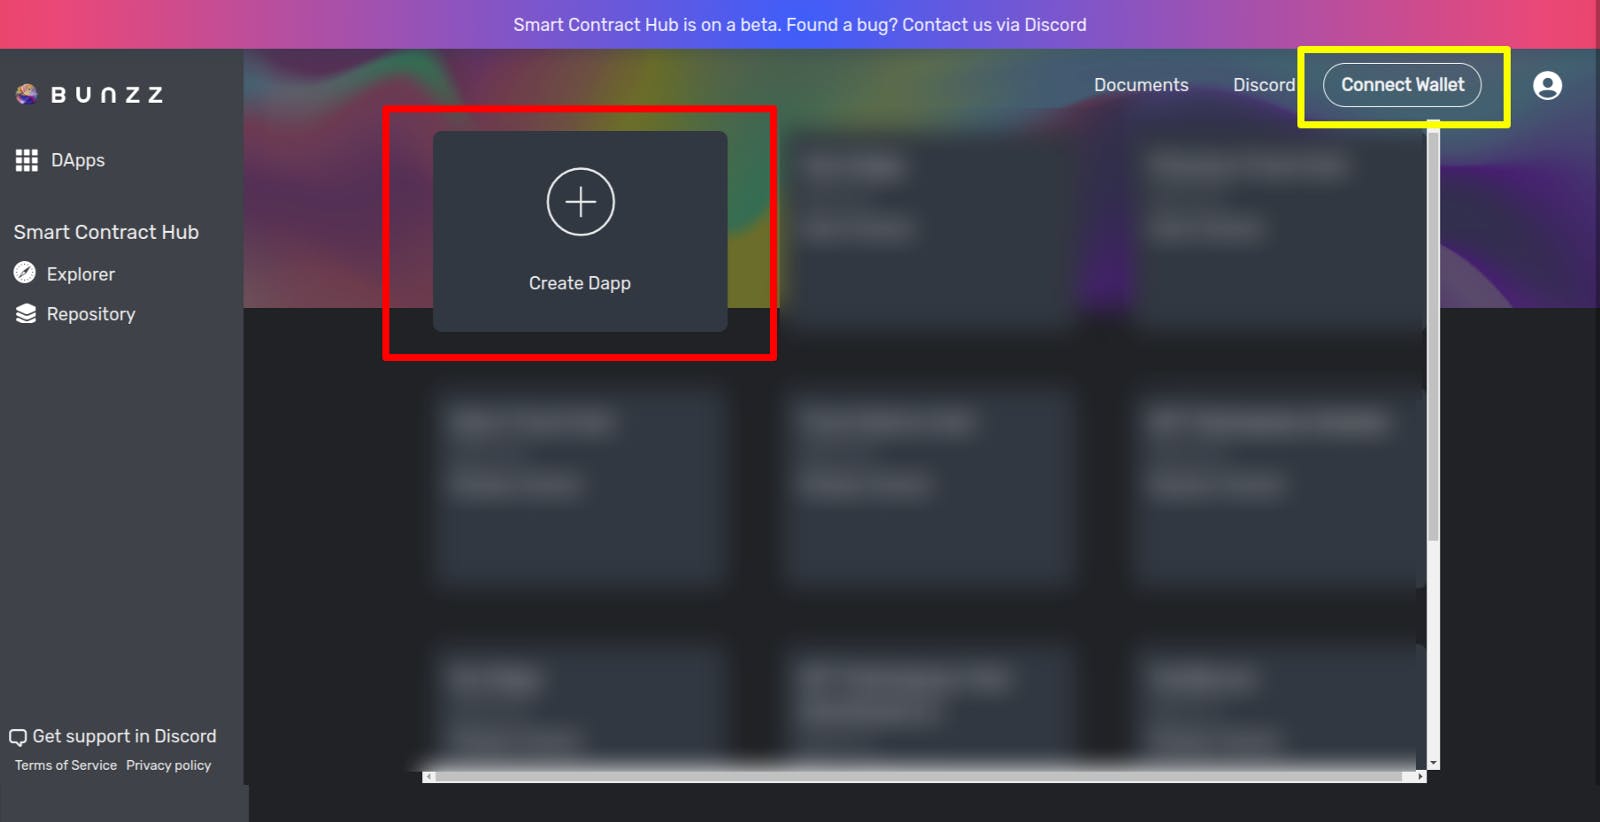
Once you are logged in, you will have access to the Bunzz dashboard where all the magic happens. The next step is to connect your Metamask wallet and then create a DApp as seen in the image below:
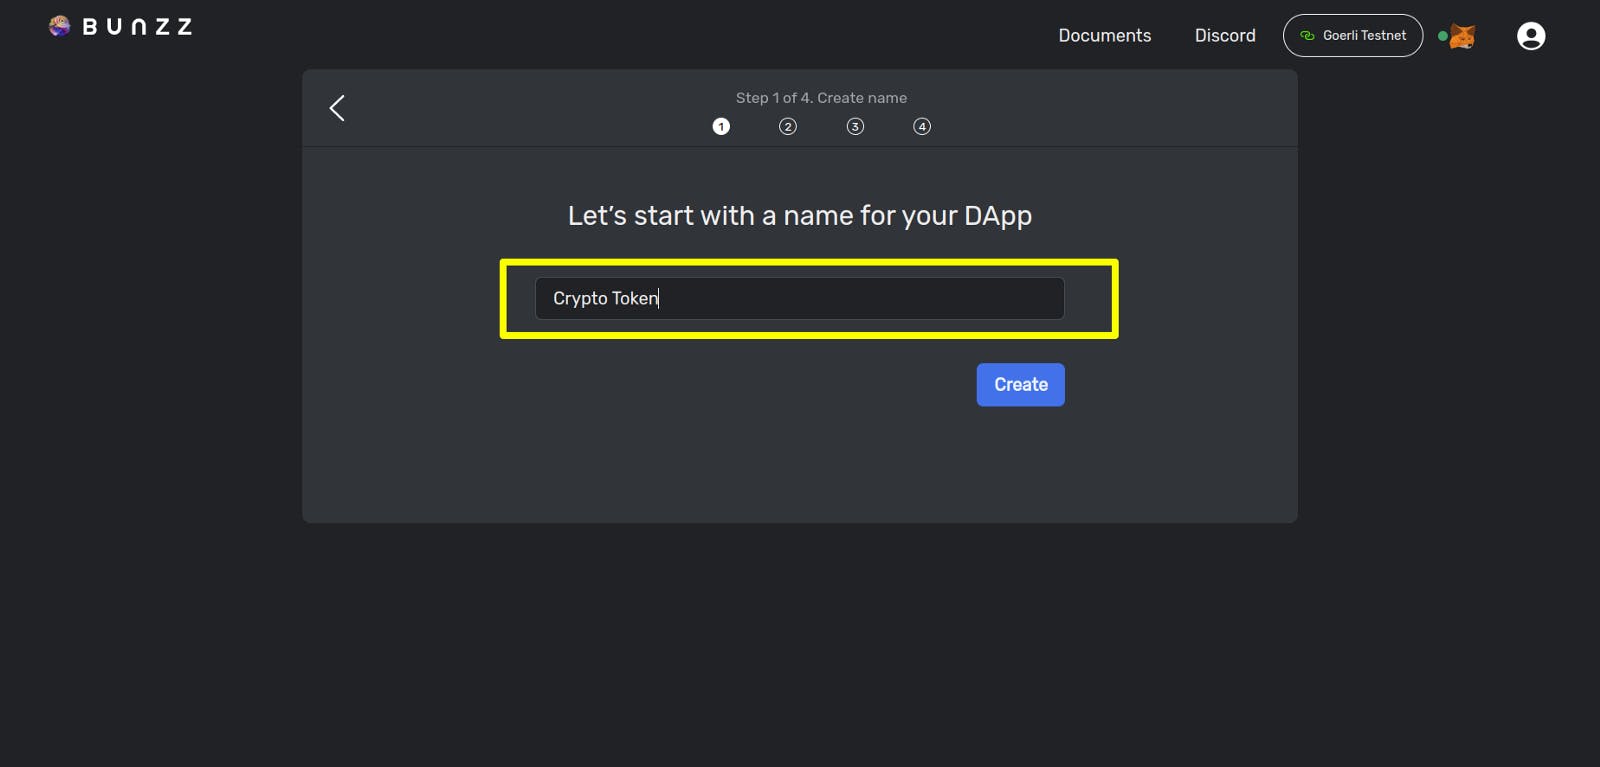
Give your DApp a name. You can use any name that comes to mind. I have used Crypto Token as mine.
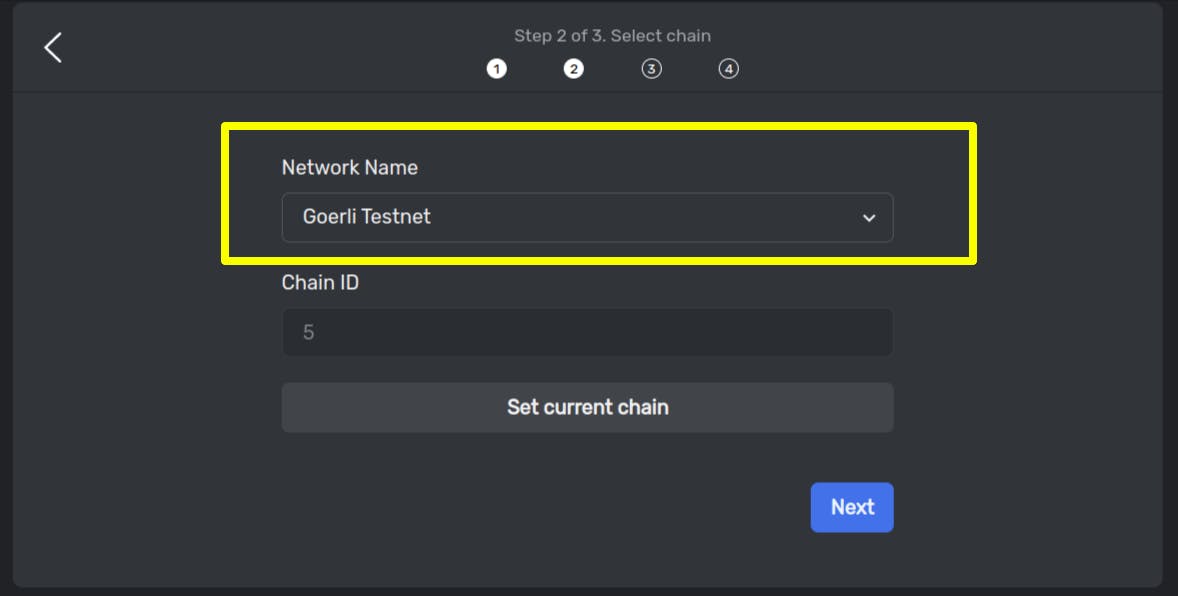
Next, you will be asked to select a network for the DApp. You can select Testnet or Mainnet depending on what you wish to do. I have chosen Goerli Testnet as seen in the image below:
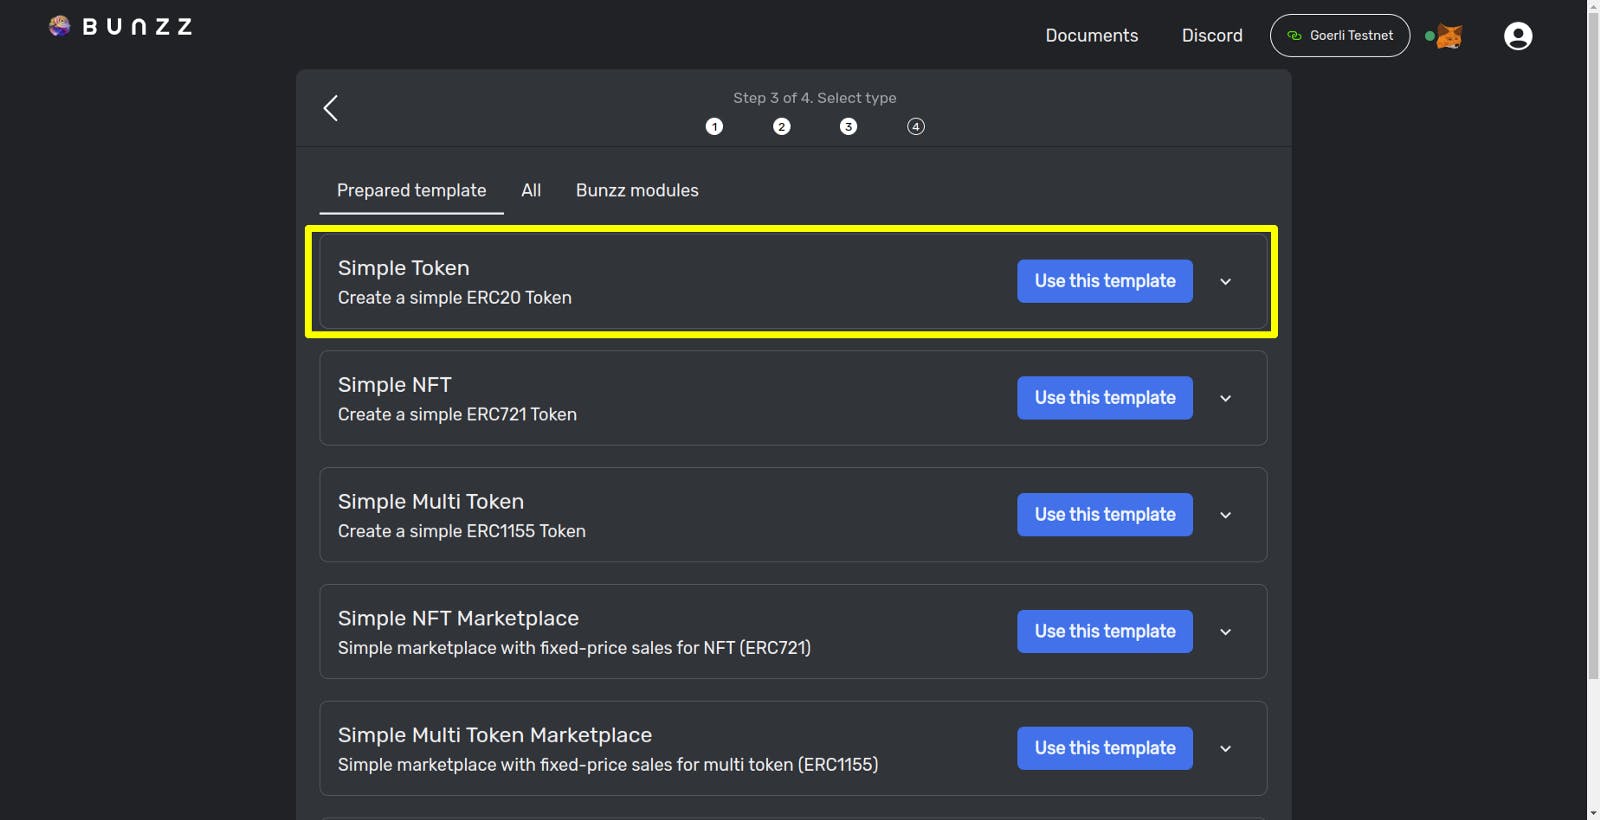
Up next is to select a template from the many available already-made smart contract templates. Since we are launching a cryptocurrency, we'd select the simple ERC20 token.
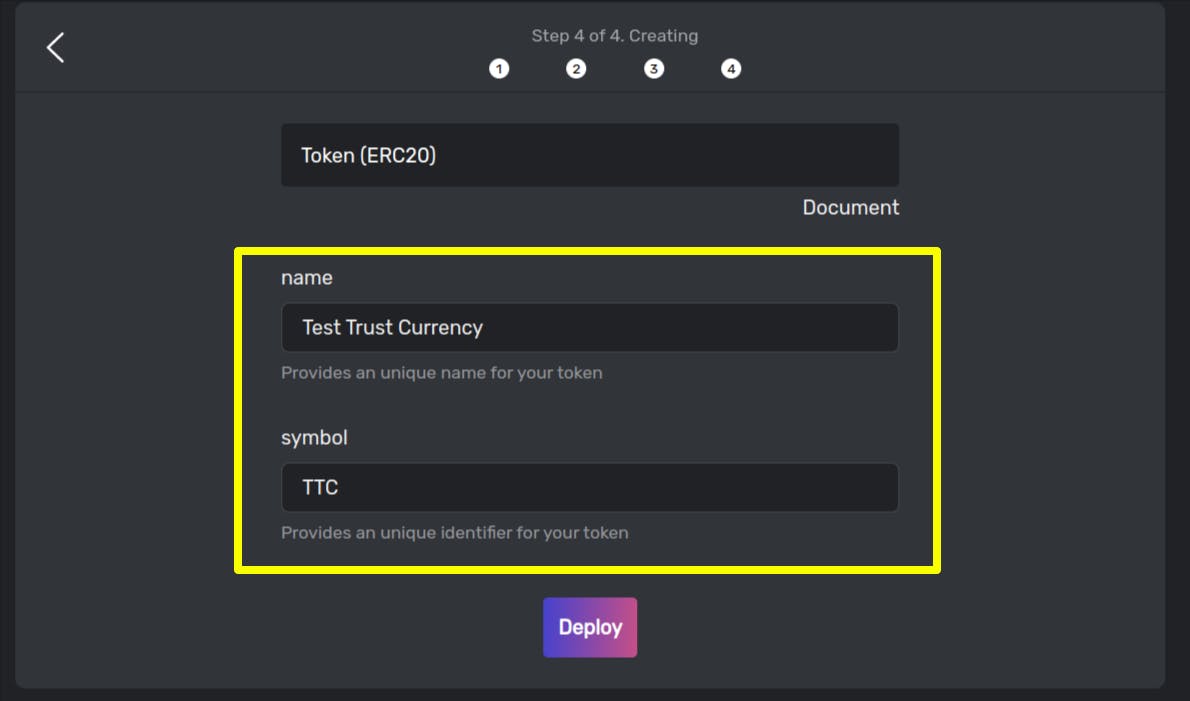
As seen in the image below, the next step is to customize the token by adding a name and a symbol. I have named the token Test Trust Currency and TTC as the symbol.
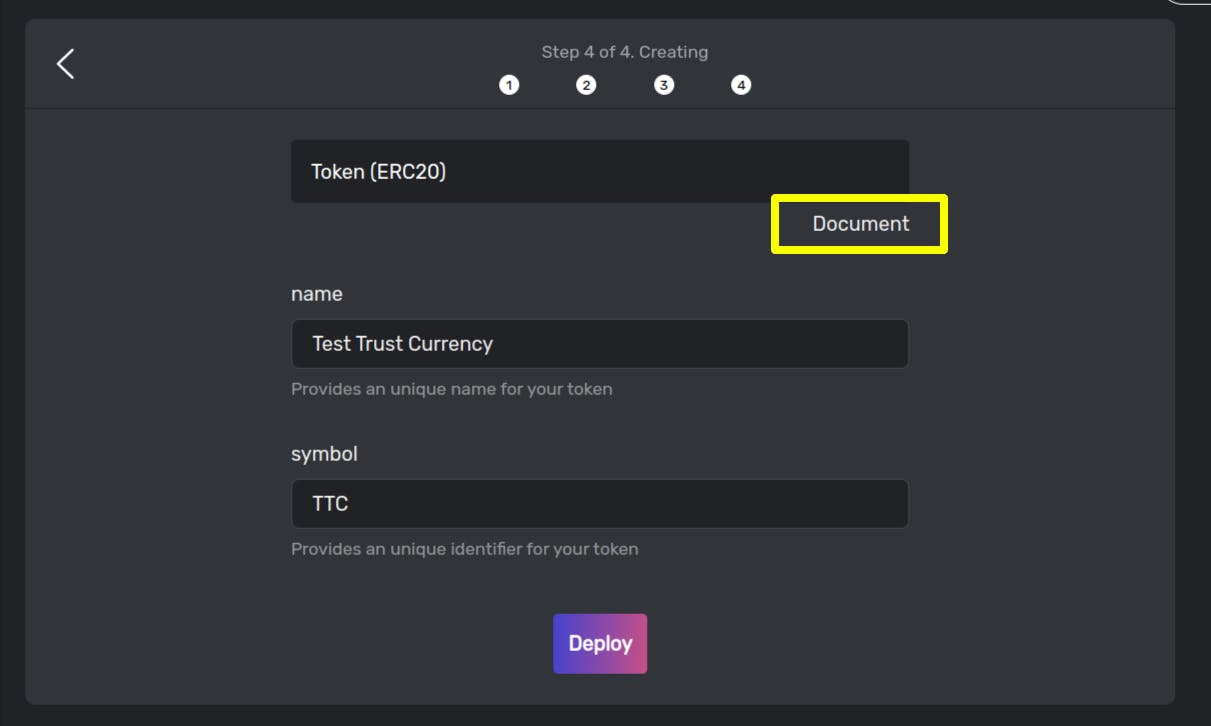
If you wish to see the code behind the ERC20 smart contract, click on the document button. In the future, Bunzz will add an edit code feature for developers to add extra functions to the Solidity code.
Once you are done customizing, click on deploy and wait for it to sync by approving three transactions that would pop up via Metamask as seen in the image below:
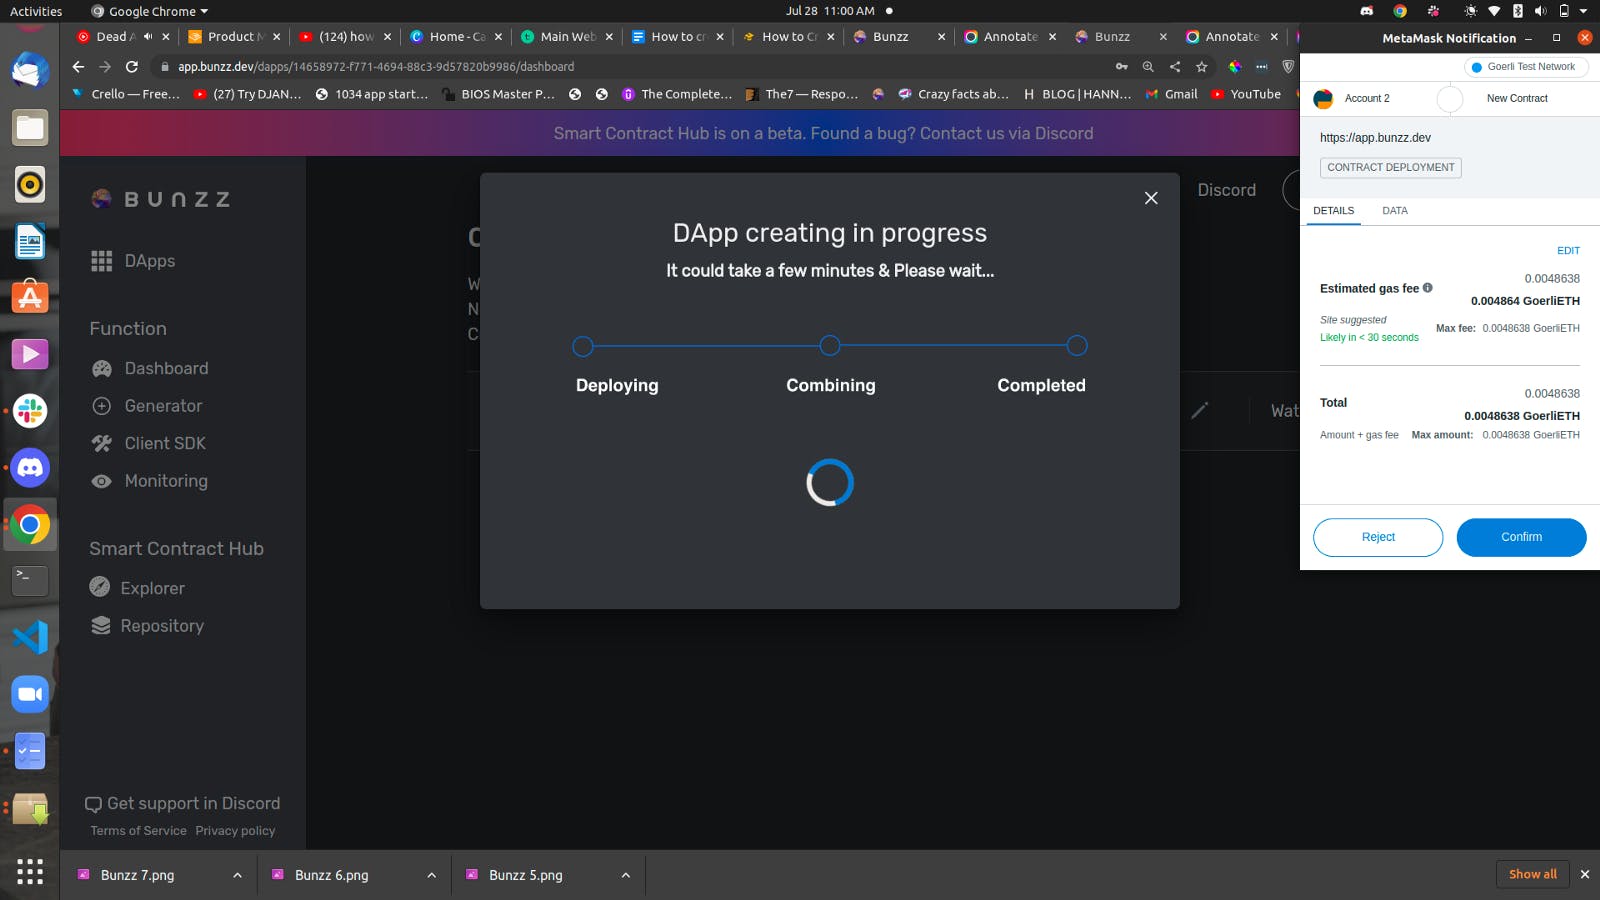
Hurray! You've done it. We have successfully deployed an ERC20 smart contract for our new token named TTC.
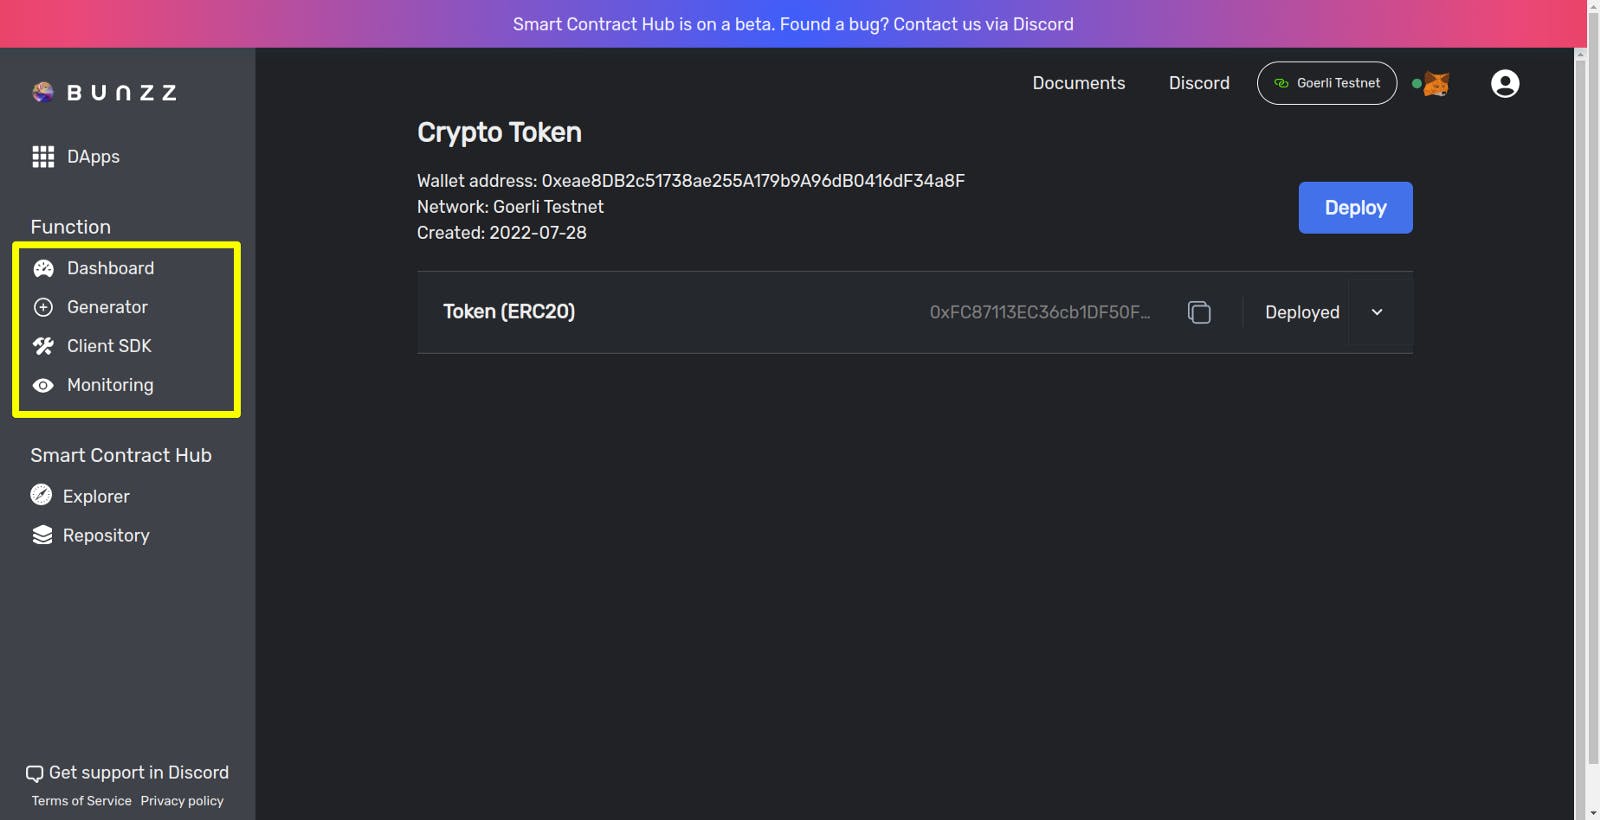
As you can see in the image below, the dashboard now has other features that will allow us to interact with and use our newly launched token as we please.
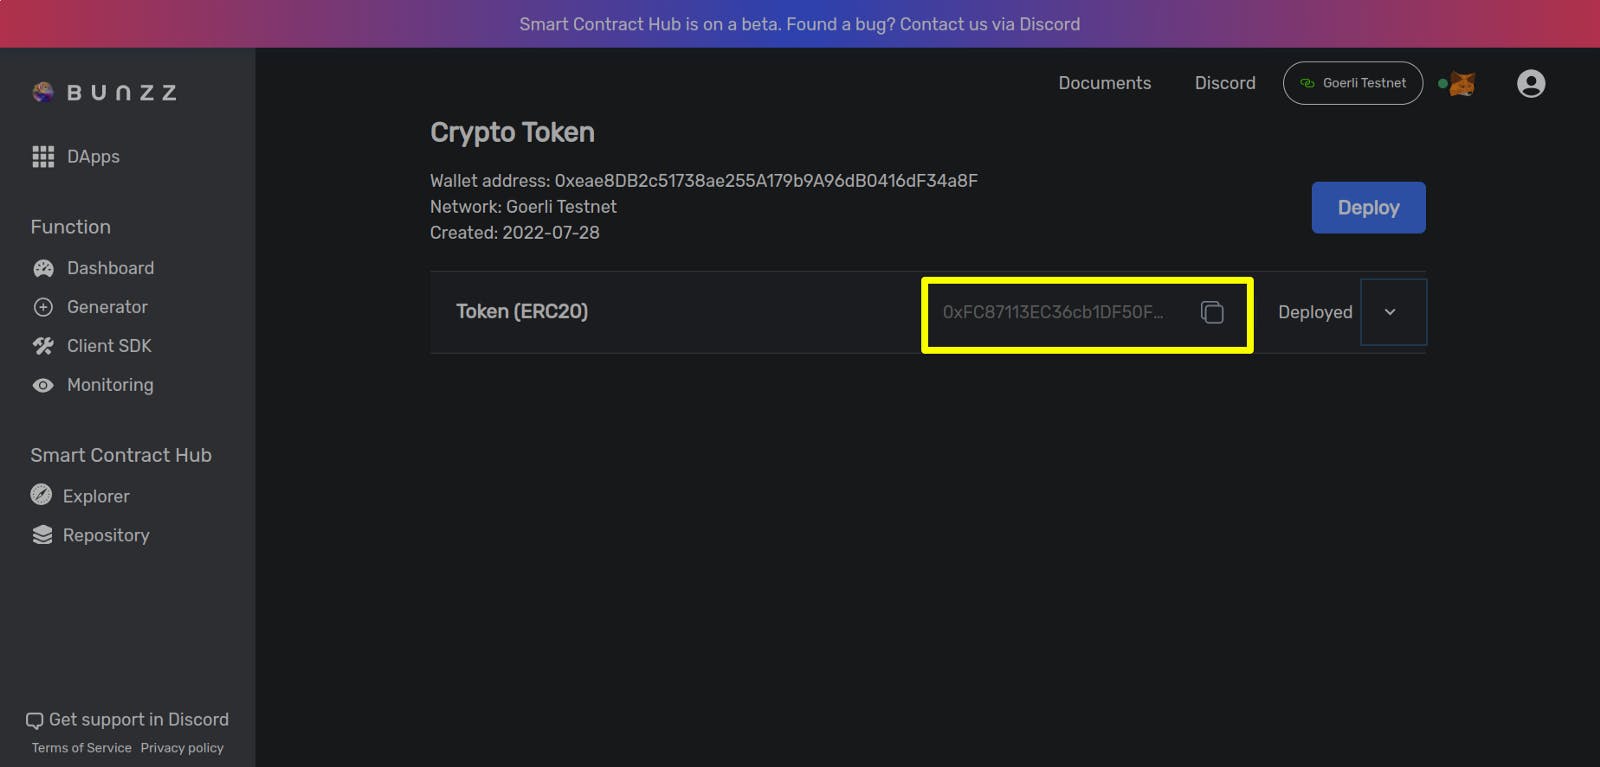
Now, proceed to check Etherscan Token Tracker and confirm if the new token is really on the blockchain. To do that, copy the token address as highlighted in the image below:
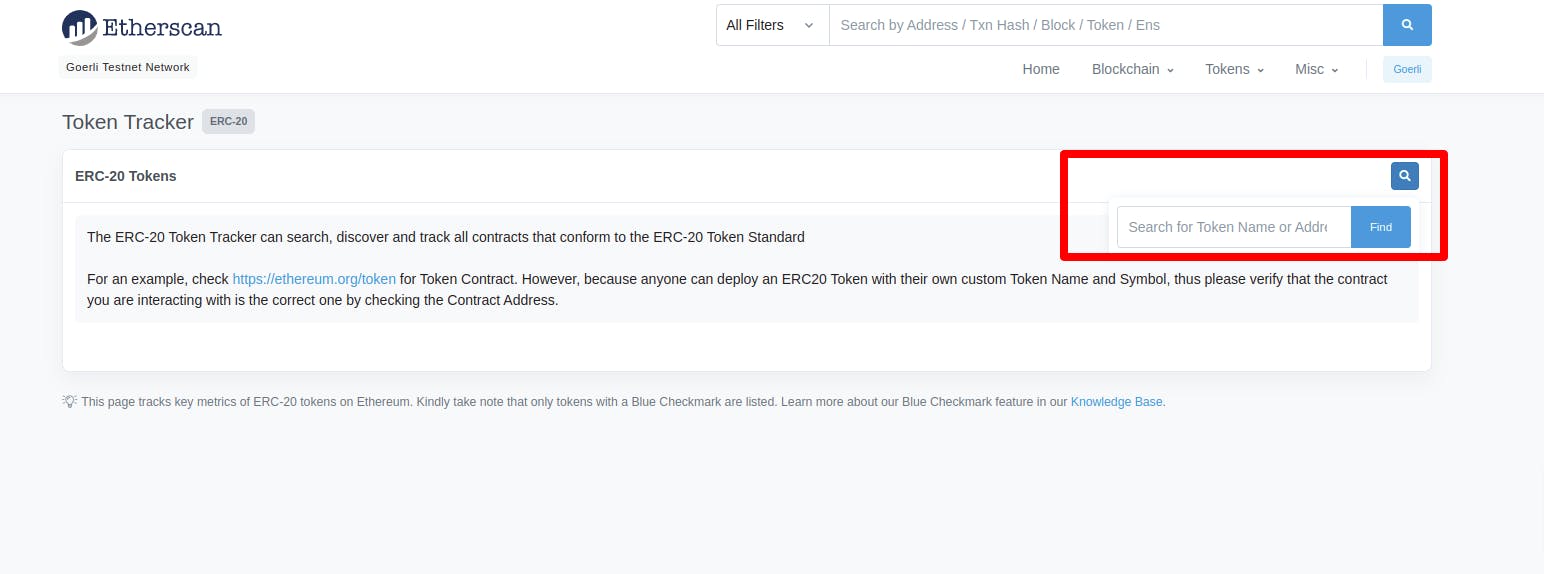
Once you have copied the address, head over to Etherscan Token Tracker, paste the address, and search.
You can see the token name and symbol we created on the Ethereum chain in the image below.
Congrats once again!
If you look at the image below closely, you'd notice that there's no supply of crypto tokens on the chain.
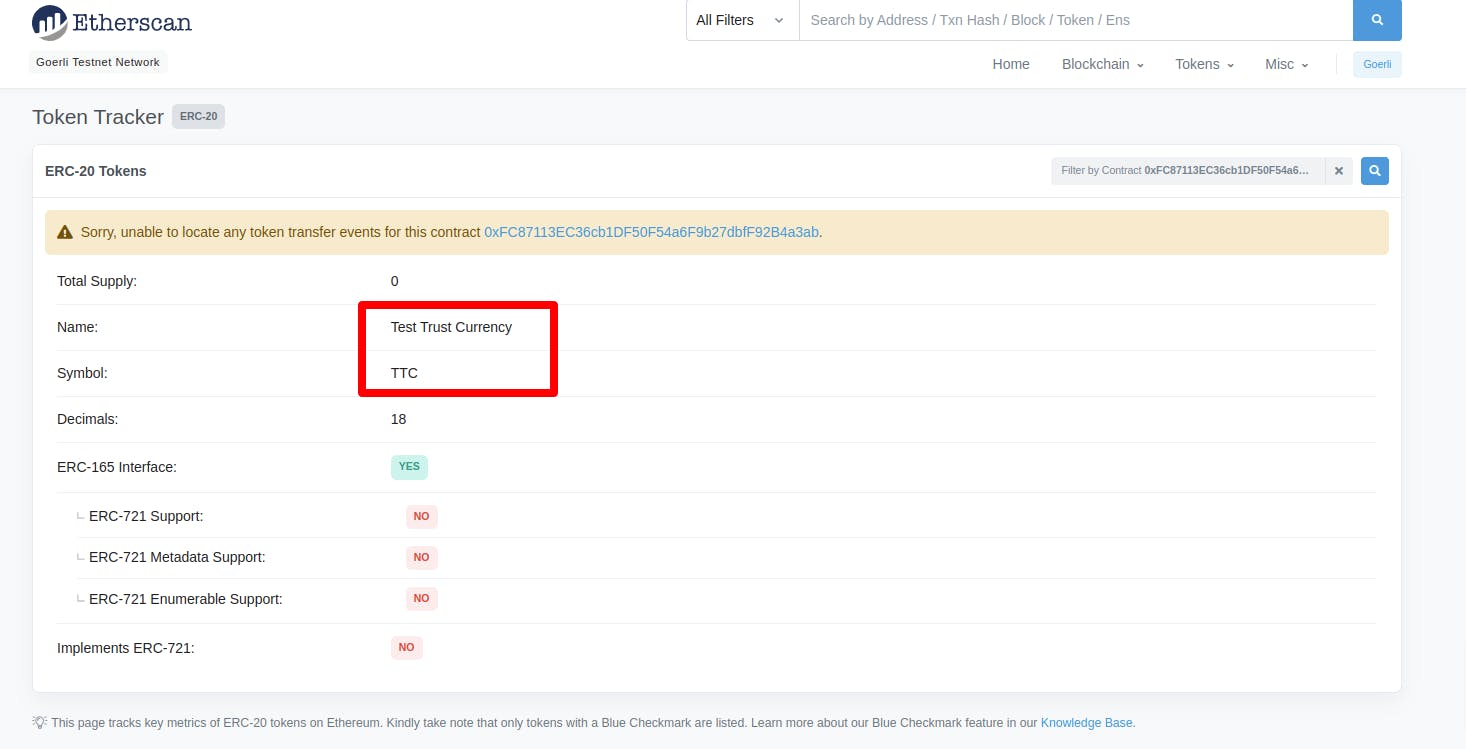
In this second part, we will fix that and mint the Test Trust Currency (TTC) we created.
Minting ERC-20 Token
To add an initial supply of the new crypto token (TTC), you need to mint it.
What does it mean to mint tokens?
What is minting?
In cryptocurrency, minting is a decentralized method that enables a person to generate a new token without the involvement of a central authority, such as the government or the bank. It can either be a non-fungible token or a crypto coin." - CoinMarketCap
In this guide, the aim is to mint TCC and add supplies of the token into the blockchain for use.
Let's begin!
Step 1. Create a Frontend Application
To make this guide a little easier, I have provided the React frontend code for this project. You can clone the repo using via this link.
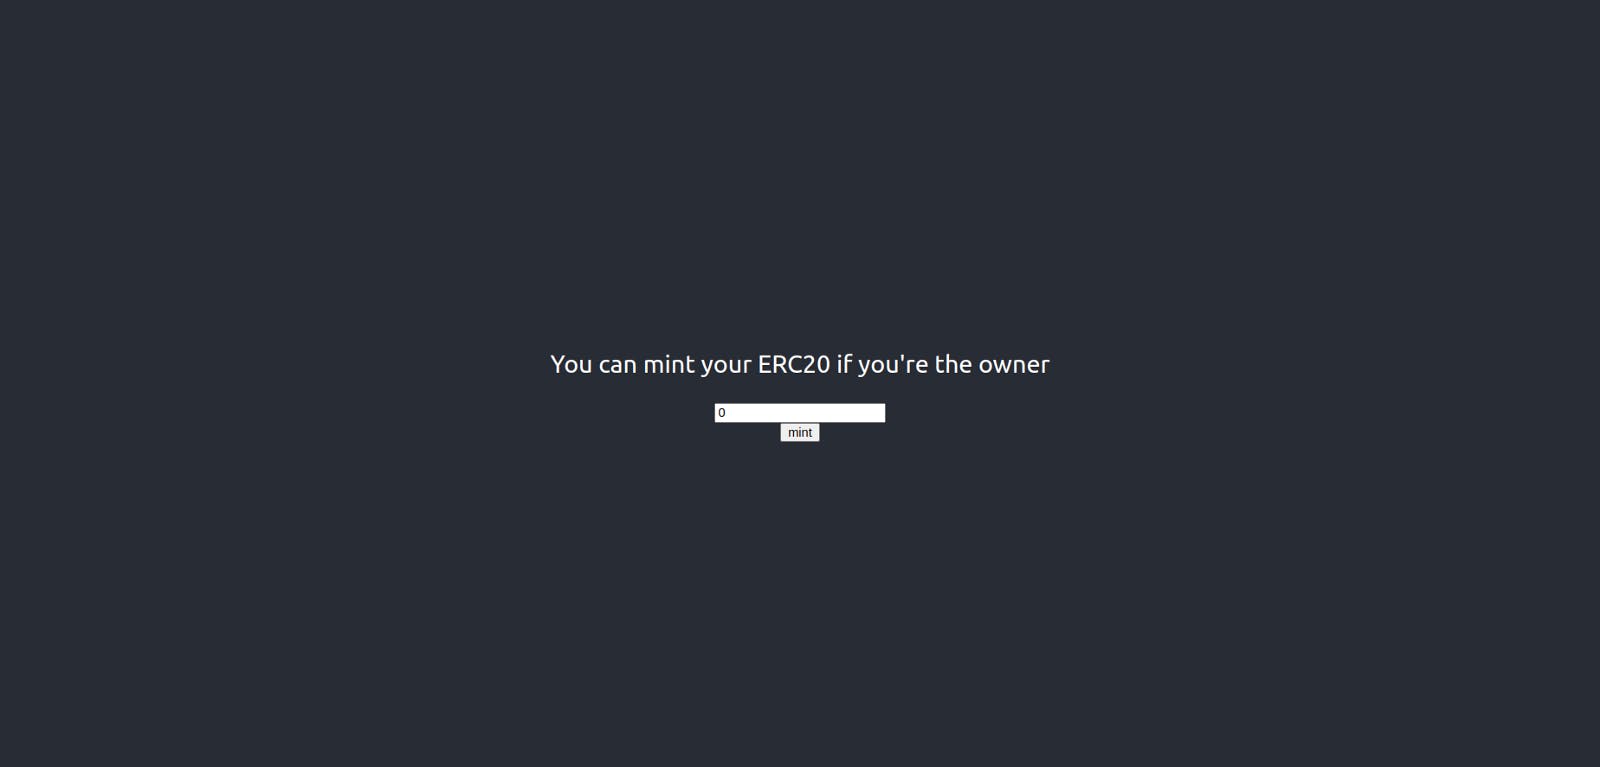
This is what you should see:

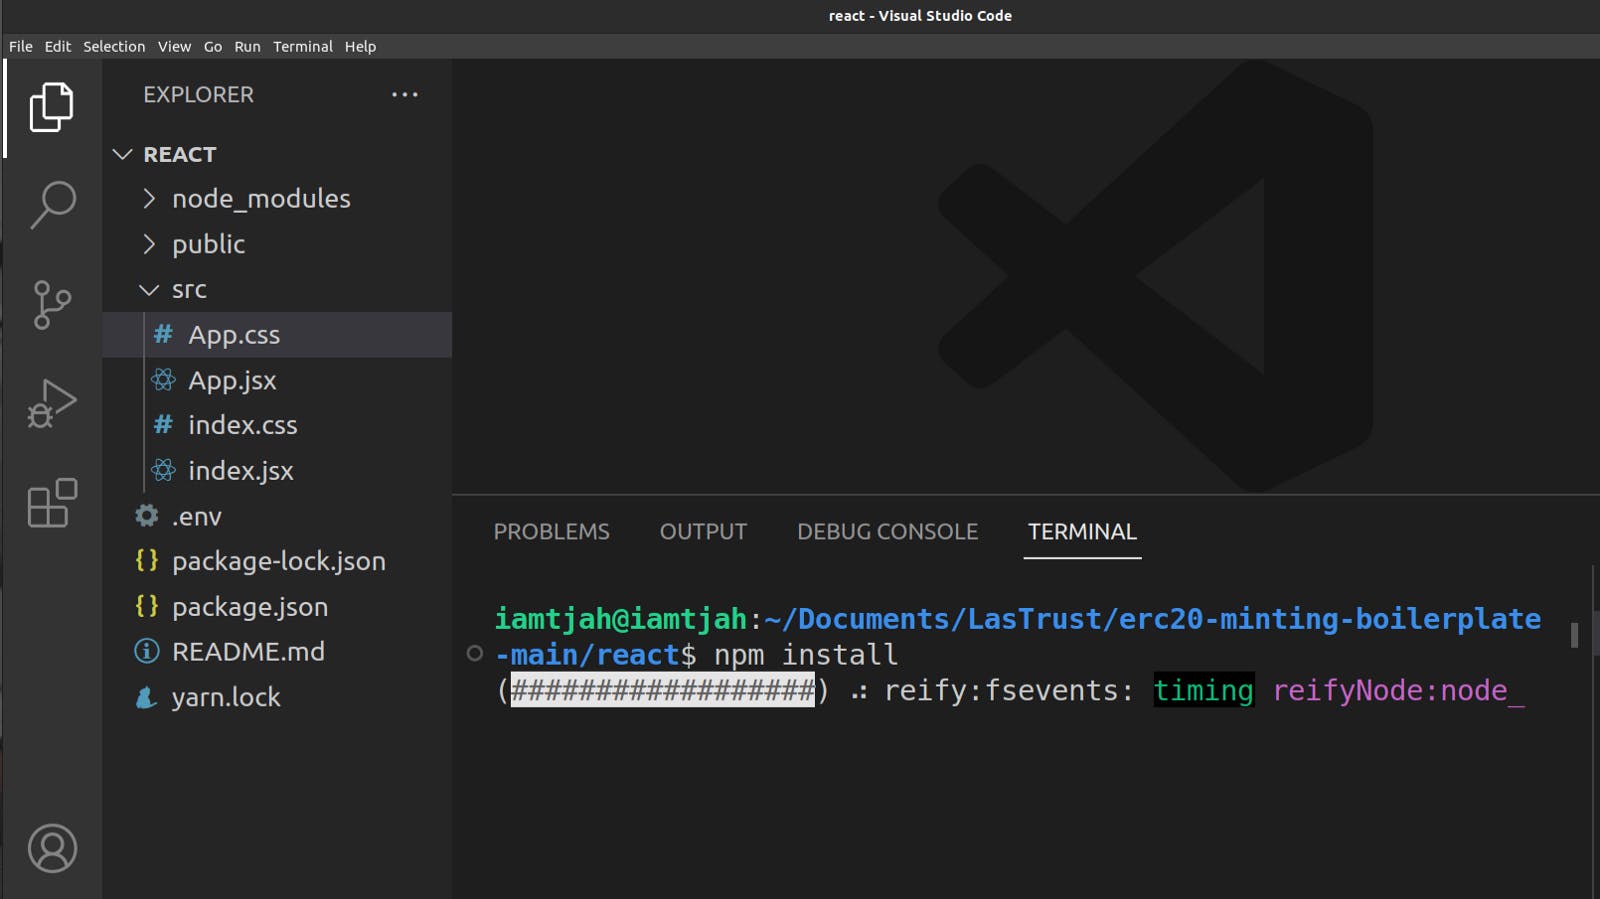
Step 2: Install Dependencies
Next, install all the dependencies using npm package manager with the command below:
npm install
If you do not have npm already installed on your system, visit this link to install npm on your system.
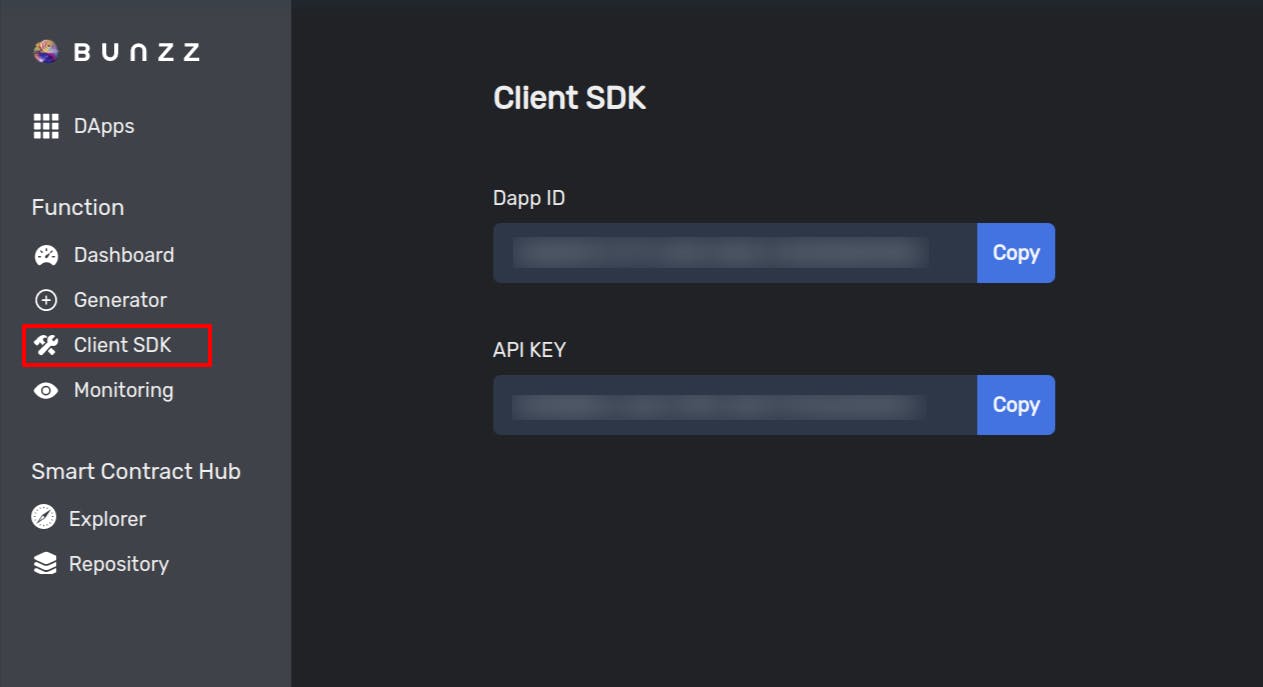
Step 3: Copy DAPP_ID and API_KEY Values
Go to the Client SDK tab in your Bunzz dashboard, copy both the Dapp ID and API KEY values, and save it for later.
Step 4: Log In to Your MetaMask Account
Since we will need to interact with the Ethereum blockchain, metamask which is a secure wallet will be used. If you are using Chrome or Firefox, Metamask offers an easy-to-use wallet as a Chrome or Firefox extension.
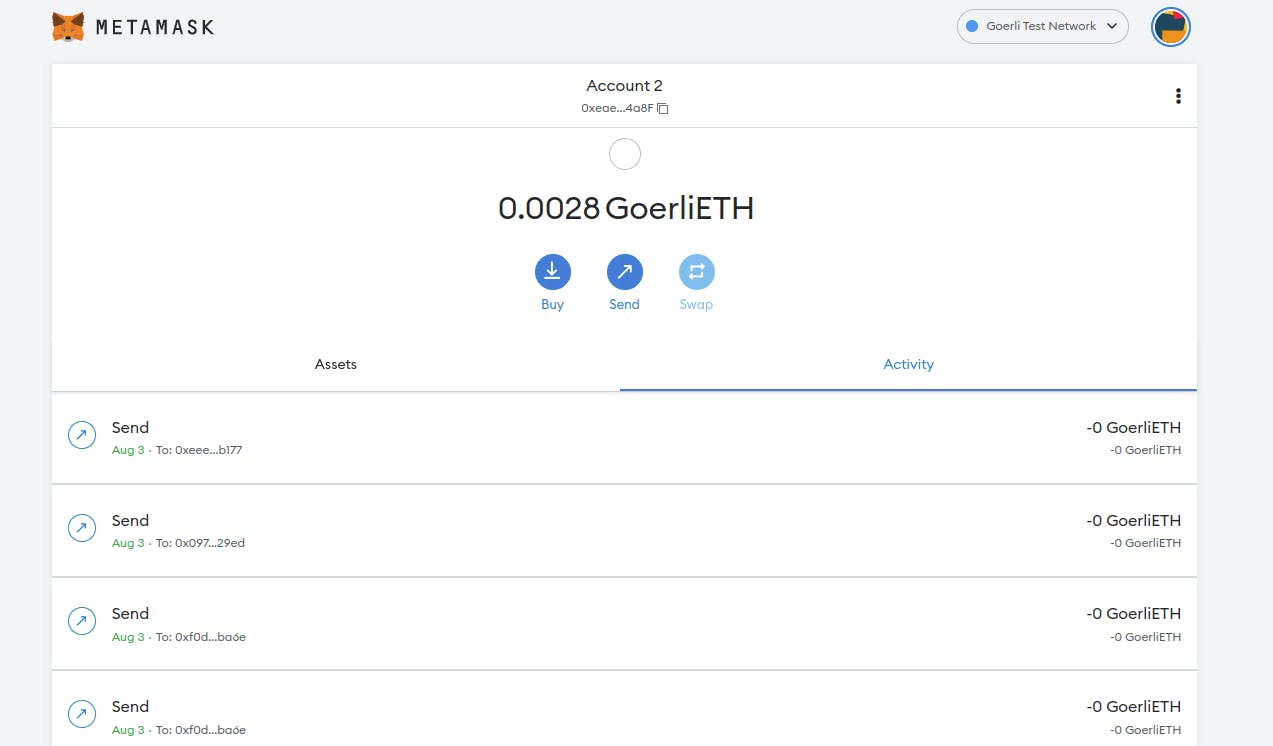
All you need to do is to download it, install it, and sign up or log in. You can visit this link to download metamask.
Step 5: Start the React App
Start the react server with the command npm run start on the VS code terminal.

The interface below is what you should see when you start the react server.
Step 6: Set DAPP_ID and API_KEY
For Bunzz to successfully mint your ERC-20 token, it needs some information about the smart contract you deployed earlier.
Bunzz SDK will get the information it needs from the Bunzz console using your DAPP ID and API KEY.
To set the DAPP_ID and API_KEY constants in the React app project you cloned earlier, create a .env file using this command in the VS code terminal:
touch .env
Copy the Dapp ID and API KEY values you copied in step 3 and paste it inside the .env file as seen in the image below:
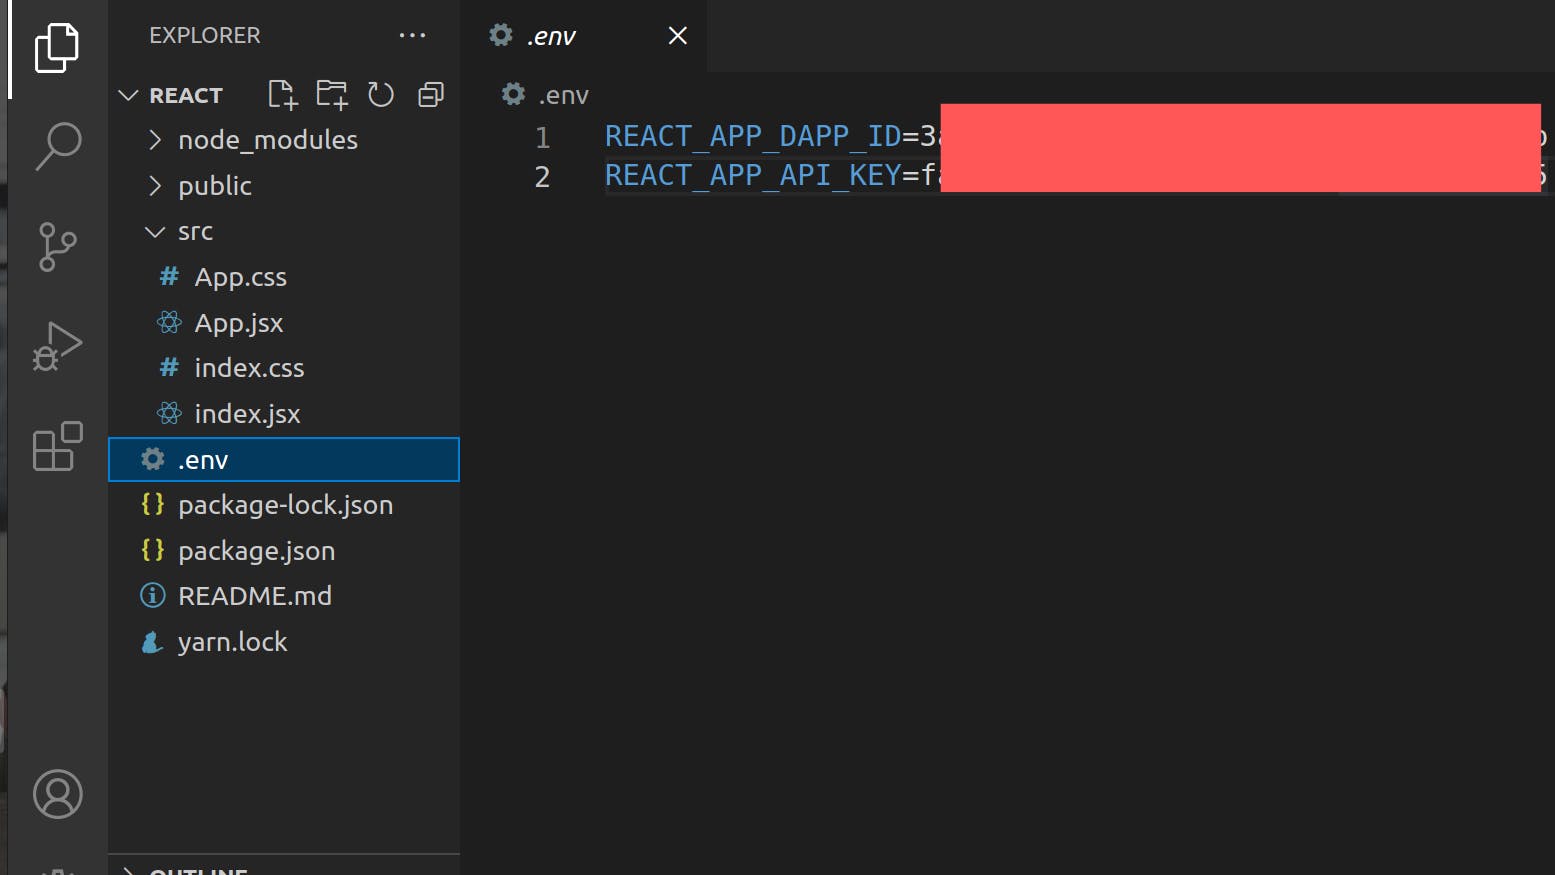
The .env file is where the DAPP_ID and API_KEY values are added
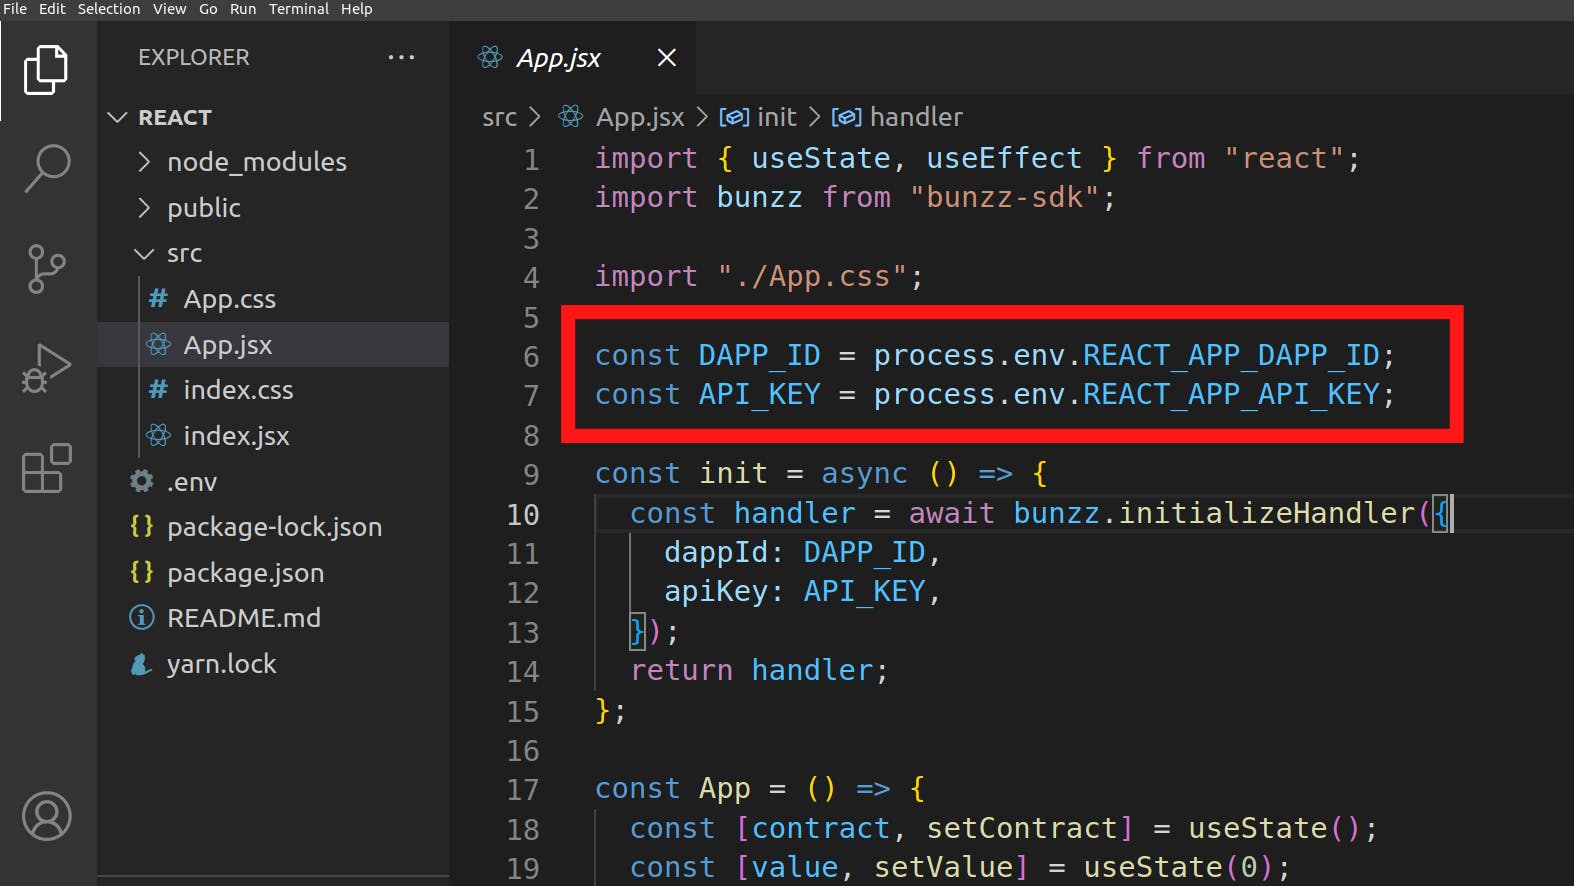
In the App.jsx file, you can see where the DAPP_ID and API_KEY values are called.
Step 7: Mint Your Token
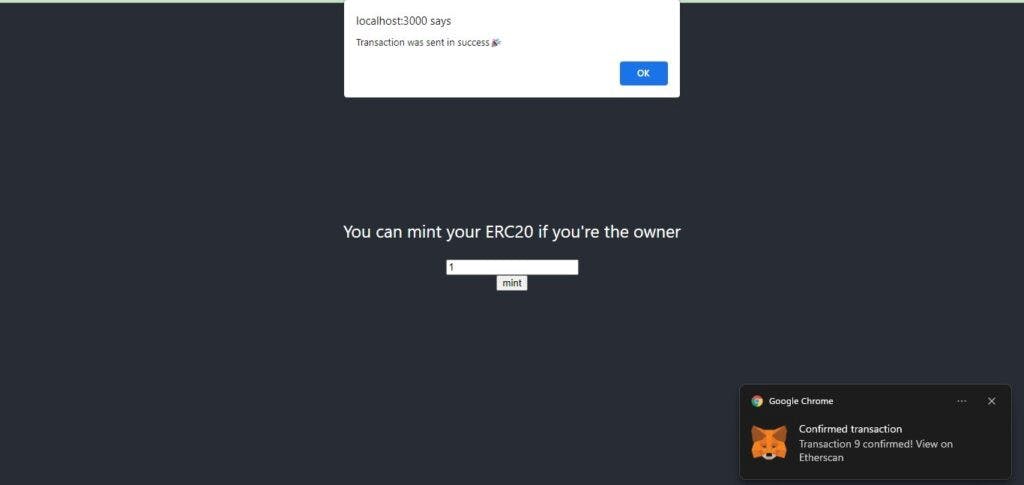
After you save, start the app again or go to the frontend app if started already and indicate the number of tokens you want to mint, it's 1 in my case.
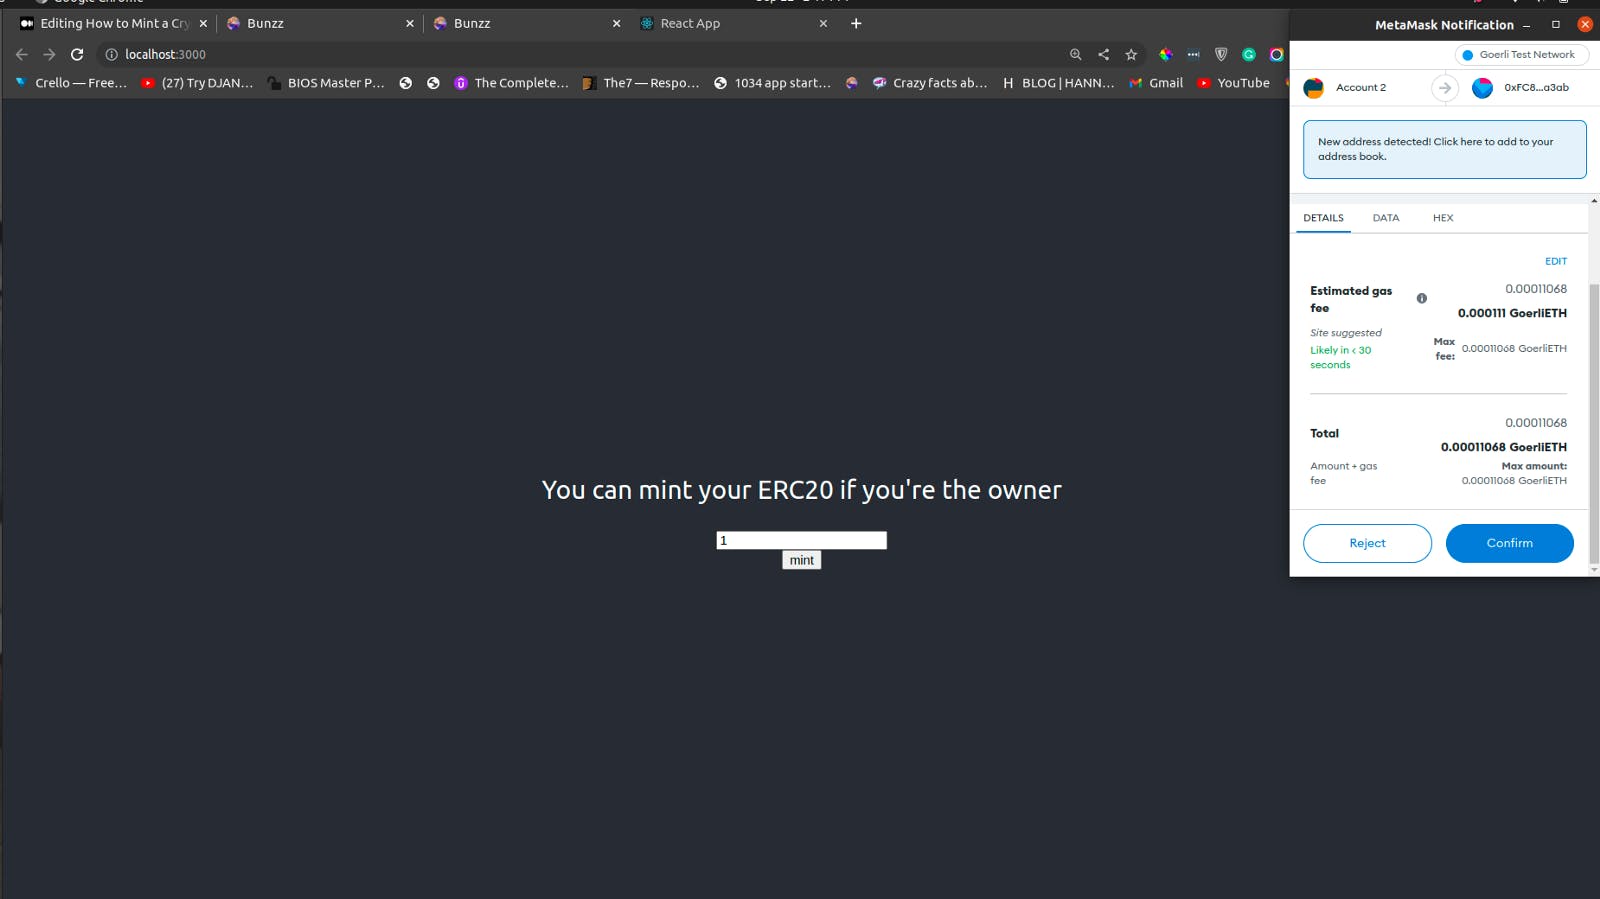
When you click on the mint button, the gas fee required for this transaction then pops up, confirm and that's all. You have successfully minted your ERC20 token.
That's it! Congratulations!
You have just created, deployed, and minted your own ERC-20 contract.
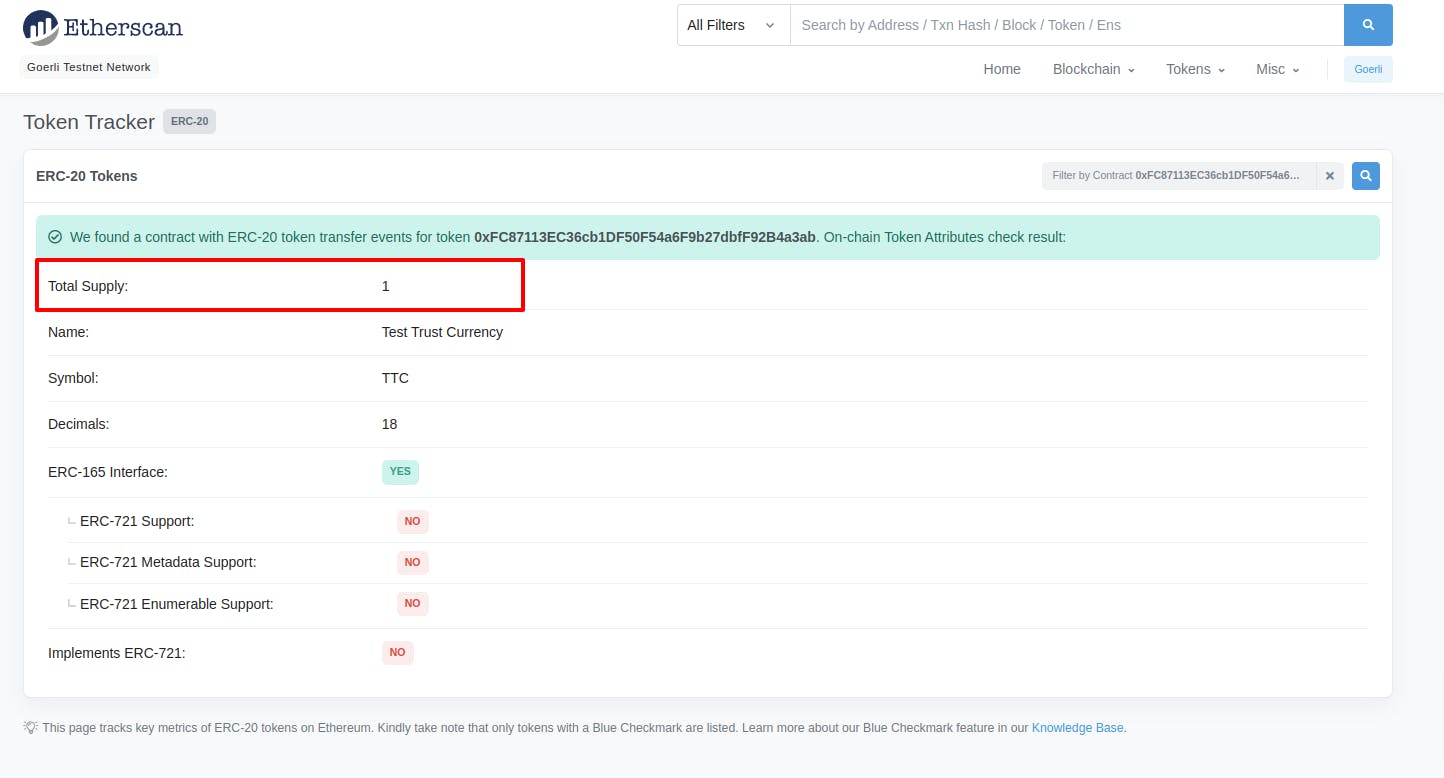
To confirm that we have minted the crypto token, head over to Etherscan Token Tracker, paste the token address (as we did towards the end of part 1), and search.
Great!
As you can see in the image above, the token has a total supply of 1 which is what we minted on our React app. You can play around with this and explore how to use this in a real-life scenario.
To know more about the code used to create the smart contract, visit Bunzz documentation and the Bunzz GitHub account.
Conclusion
If you decide to make your own public token, make sure to use this guide only as a starting point. It's a deep topic that takes a long time to understand fully.
Beyond creating the token, you also need to think about making it a success post-launch and studying other projects and their launches to see what worked well and what didn't can help with creating your own token.
Want to Connect? If you follow these steps and got stuck, or if you have any questions, feel free to reach out on Discord or send a DM on Twitter.